
각진 세상에 둥근 춤을 추자
윈도우 Ubuntu 환경에서 오라클 11g 설치 본문
1. Oracle Database Downloads (Oracle Database 11gR2 Express Edition for Linux x64)
https://www.oracle.com/database/technologies/xe-prior-release-downloads.html
XE Prior Release Archive
Getting Started: Support Oracle Database Express Edition (XE) is a community supported edition of the Oracle Database family. Please go to the Oracle Database XE Community Support Forum for help, feedback, and enhancement requests. Note: Oracle Support Ser
www.oracle.com
2. winscp를 이용해 ubuntu 서버에 해당 압축 파일 이동
(1) winscp에 download 폴더 생성
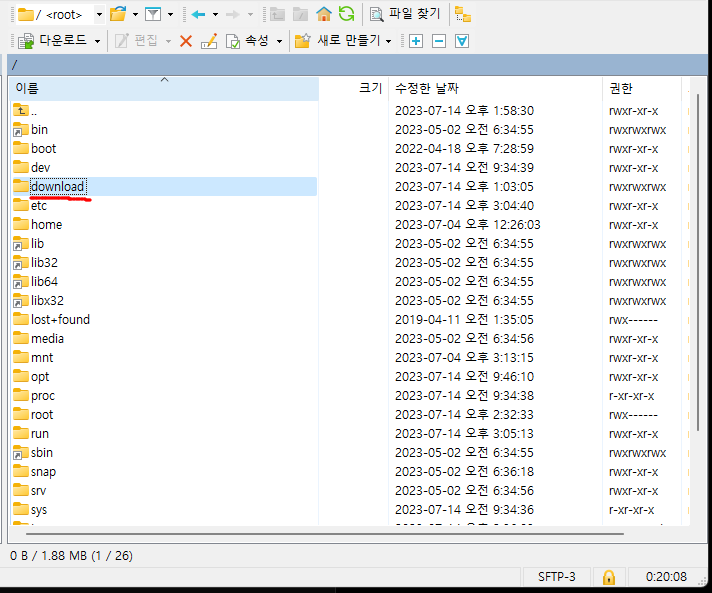
(2) 다운로드 폴더 내 압축 파일 이동

3. ubuntu 터미널 접속
# 관리자 접속

$ su root
$ 생성한 비밀번호
$ apt-get update
$ apt-get upgrade
$ apt-get install unzip# winscp download 파일 권한 설정
$ cd/
$ chmod 777 download# 압축 풀기
$ cd download
$ unzip oracle*# rpm 파일을 dev 파일로 변환
$ sudo apt install rpm
$ sudo apt install alien
$ sudo apt install libaio1
$ sudo apt install unixodbc
$ cd Disk1
$ sudo alien --scripts -d [오라클 rpm파일명]
(ex) sudo alien --scripts -d oracle-xe-11.2.0-1.0.x86_64.rpm.zip# 오라클 가상메모리 확보를 위한 swap설정 및 bc패키지 설치
$ cd /
$ mkdir /swap
$ dd if=/dev/zero of=/swap/swapfile bs=1024 count=2097152
$ cd /swap
$ mkswap swapfile
$ sudo chmod 600 /swap/swapfile
$ swapon swapfile
# 에러 발생시: swapon: /swap/swapfile: swapon failed: Device or resource busy
(1) 사용 중인 스왑 해제 : sudo swapoff -a
(2) 스왑 파일 활성화 : swapon swapfile# oracle dev 파일 설치
$ cd /download
$ cd Disk1
$ sudo dpkg -i oracle-xe_11.2.0-2_amd64.deb
# 경고문 발생시
# You must run '/etc/init.d/oracle-xe configure' as the root user to configure the database.
$ /etc/init.d/oracle-xe configure
(1) Specify the HTTP port that will be used for Oracle Application Express [8080]: -> 엔터
(2) Specify a port that will be used for the database listener [1521]: -> 엔터
(if) Port 1521 appears to be in use by another application. Specify a different port.
(3) Specify a port that will be used for the database listener [1521]: -> 다른 포트번호 입력
Specify a password to be used for database accounts. Note that the same
password will be used for SYS and SYSTEM. Oracle recommends the use of
different passwords for each database account. This can be done after
initial configuration: -> 엔터
(4) Password can't be null. Enter password: -> 사용할 패스워드 입력 (특수문자 사용불가)
(5) Do you want Oracle Database 11g Express Edition to be started on boot (y/n) [y]: -> y
# 에러 발생 시
(1) Database Configuration failed. -> /etc/hostname에 자신의 hostname 추가해야 함
(2) 설정파일을 통해 hostname 알기 -> cat /etc/hostname
(3) host ip -> hostname -i
(3) hosts 파일 등록 -> sudo vi /etc/hosts -> ip와 hostname 추가
4. 오라클 설치 확인
# 오라클 실행
$ systemctl start oracle-xe

# 오라클 실행 확인
$ systemctl staus oracle-xe
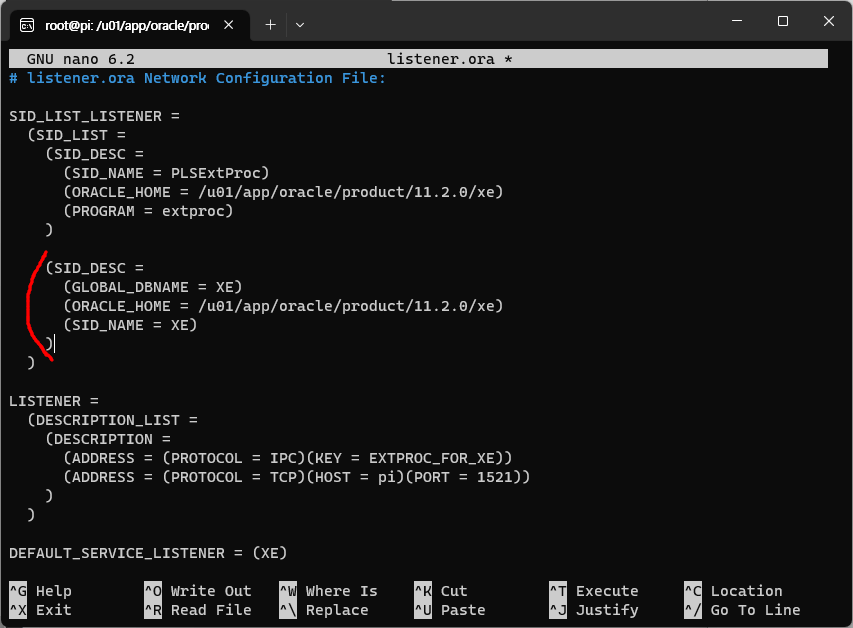
5. 리스너 등록 및 텍스트 파일 수정
$ cd /u01/app/oracle/product/11.2.0/xe/network/admin
$ nano listener.ora
# 해당 내용 추가하기
(SID_DESC =
(GLOBAL_DBNAME = XE)
(ORACLE_HOME = /u01/app/oracle/product/11.2.0/xe)
(SID_NAME = XE)
)
'Linux' 카테고리의 다른 글
| [vmware] VMware Workstation 17 Plyaer 컴퓨터 가상머신 설치 (0) | 2024.03.05 |
|---|---|
| 윈도우 Ubuntu 환경에서 MariaDB 설치 (0) | 2023.07.14 |
| 윈도우 Ubuntu 환경에서 Telnet&SSH 설치 (0) | 2023.07.04 |
| 윈도우 WSL 환경에서 우분투 리눅스 설치 및 구동 (0) | 2023.07.04 |
| [Linux] Mac (인텔칩) CentOS + Virtual Box 다운로드 및 설정 (0) | 2022.10.25 |
'Linux' Related Articles
more


